Imagine harnessing hundreds, even thousands, of gallons of free water directly from the sky. For every inch of rain, an average 1,000 square foot roof can collect approximately 600 gallons of water. Don't let this incredible resource simply run off into storm drains! Whether you're aiming for greater self-sufficiency, reducing your water bill, or providing a consistent, chemical-free water supply for your garden, learning how to build a rainwater catchment off a roof is a remarkably practical and rewarding endeavor.
The best part? You don't need a massive budget or specialized skills. With a little planning and some readily available materials, you can construct an effective rainwater collection system for under a hundred dollars. This comprehensive guide will walk you through the process, from selecting your components to setting up your system, ensuring you can start collecting precious rainwater in no time.
Why Harvest Rainwater? The Benefits of a DIY System
Diving into rainwater harvesting isn't just a trend; it's a smart, sustainable choice with a host of tangible benefits:
- Cost Savings: The most immediate and appealing benefit is the reduction in your water bill. By using collected rainwater for non-potable purposes, you significantly decrease your reliance on municipal water, saving money year-round.
- Environmental Stewardship: Rainwater harvesting lessens the strain on local water supplies and reduces stormwater runoff, which can carry pollutants into natural waterways. It's a direct contribution to water conservation and ecological health.
- Enhanced Garden Health: Plants absolutely love rainwater. Unlike treated tap water, rainwater is naturally soft and free of chlorine, fluoride, and other chemicals that can be detrimental to soil microbiology and plant health. Your garden will thrive with this natural nourishment.
- Self-Sufficiency and Off-Grid Potential: For those living in rural areas or aspiring to an off-grid lifestyle, a reliable water source is paramount. A robust rainwater collection system provides independence and security, especially during droughts or utility outages. It's a foundational step towards true self-reliance, giving you control over your water supply. For more insights on maximizing your water collection for off-grid living, check out our guide on Off-Grid Water: Collect Hundreds of Gallons From Your Roof.
- Simplicity and Affordability: As you'll discover, building a basic rainwater catchment system is surprisingly straightforward and can be accomplished with a minimal financial outlay, making it accessible to almost anyone.
Essential Components for Your Budget-Friendly Catchment System
To embark on your rainwater harvesting journey, you'll need a few key components. The good news is that most can be sourced affordably, keeping your project well within the under-$100 budget.
Selecting Your Water Storage Barrels
Your water storage barrels are the heart of your system. While new rain barrels are available, going the repurposed route is key to significant cost savings.
- Used Barrels are Gold: Look for food-grade plastic drums from local businesses (e.g., car washes, food processing plants, farms) that receive products in large containers. Many are happy to give them away or sell them cheaply. Large, durable plastic trash cans can also be adapted if they are sturdy enough.
- Capacity and Quantity: A typical rain barrel holds between 30 and 55 gallons. Consider starting with one or two. Remember, you can easily connect multiple barrels in a series to dramatically increase your storage capacity, providing hundreds of gallons of water at your disposal.
- Safety First: This is critical! NEVER use barrels that previously contained oil, pesticides, hazardous chemicals, or any toxic substances. These chemicals are almost impossible to completely remove and can leach into your collected water, making it unsafe for any use, especially in gardens where it could contaminate soil or edibles. Always confirm the previous contents.
- Cleaning: Once you've secured your barrels, clean them thoroughly with soapy water and rinse multiple times to remove any residue from their previous use.
Guttering and Downspout Solutions
The roof of your chosen structure acts as your primary collection surface. Gutters are essential to channel this water effectively.
- Affordable Gutters: Cheap vinyl gutters are your budget-friendly champion here. They are lightweight, easy to cut, and simple to install compared to their metal counterparts. You'll need enough guttering to run along the eave of your roof section.
- Mounting Hardware: Gutter mounts or hangers are necessary to secure the gutters to your building. For a sturdy connection, especially on a shed wall, consider using machine screws with washers and nuts. This method provides superior hold compared to simple screws that might pull out over time.
- Downspout and Flex Spout: You'll need a gutter end with a drop to direct the water downwards. A flexible downspout extension (often called a "flex spout") is ideal for directing the water precisely into your rain barrels. This allows for easy adjustments.
Connecting and Securing Your System
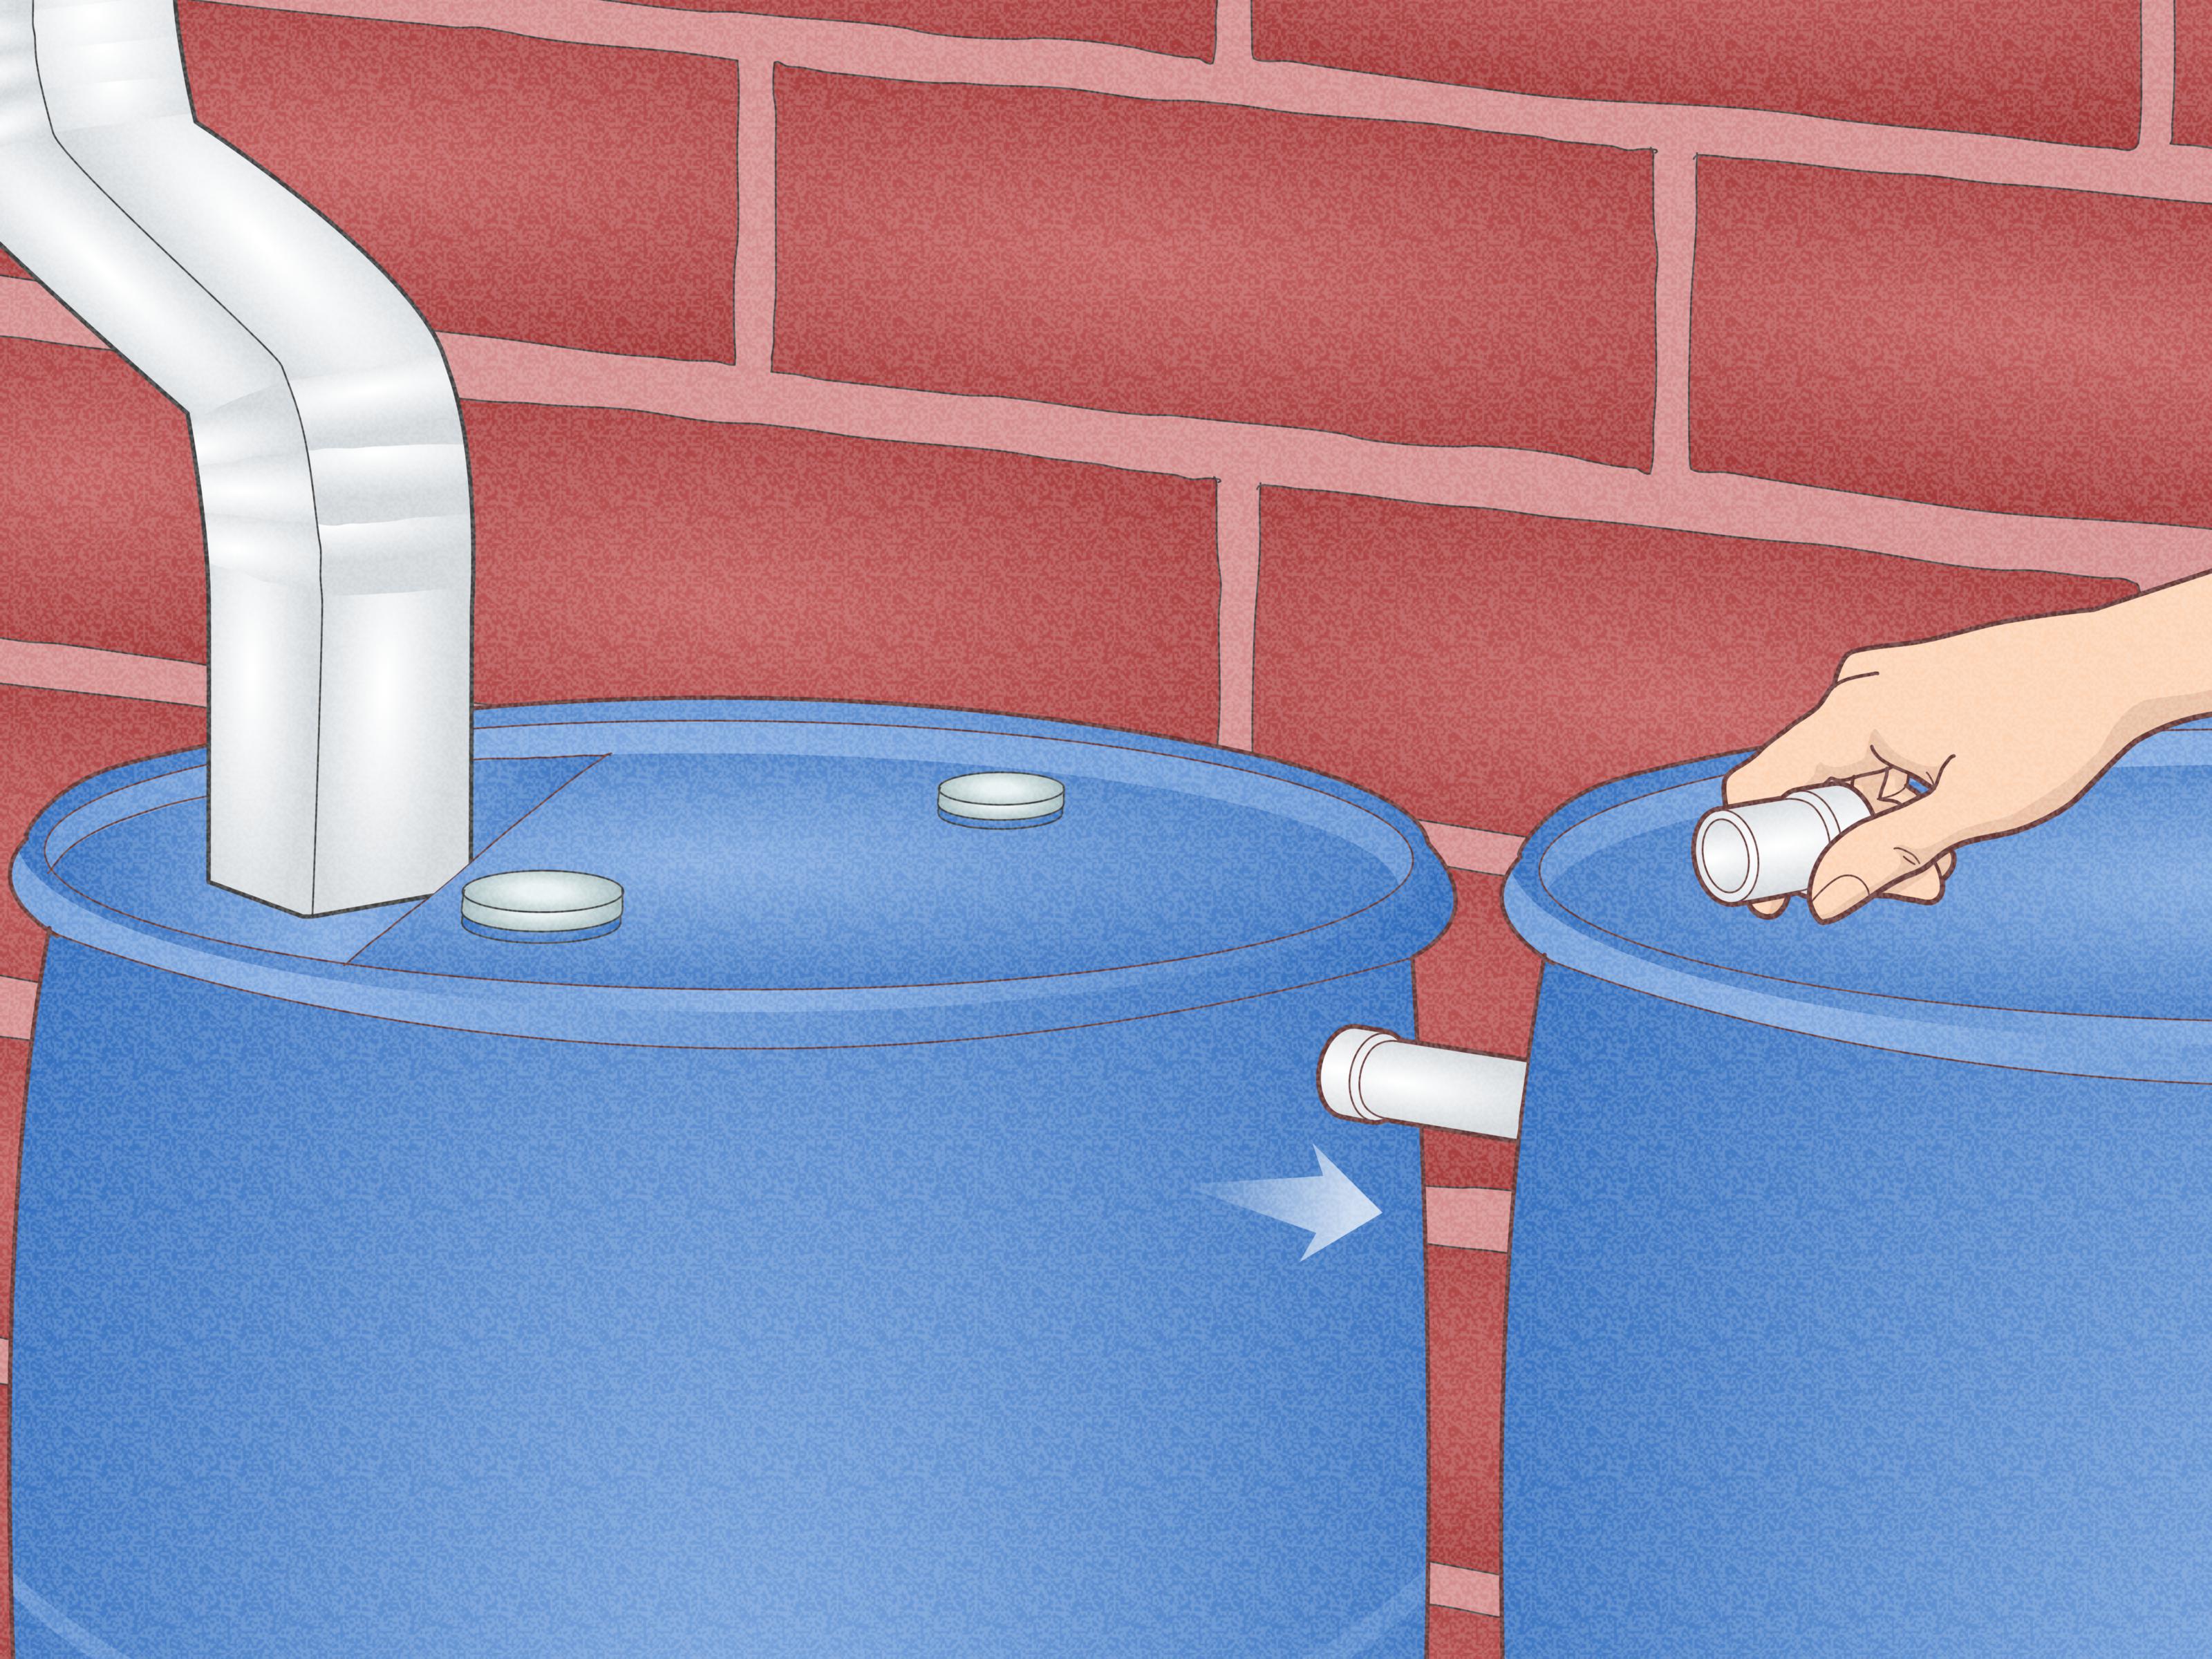
- Barrel Connectors: If you're using multiple barrels, you'll need short hoses (often garden hose sections) and bulkhead fittings or connectors to link them at the bottom. This allows water to flow from one barrel to the next as they fill, creating a single, larger storage unit.
- Stability is Key: Rain barrels become incredibly heavy when full (a 55-gallon barrel weighs over 450 pounds!). To prevent tipping, especially if placed on slightly uneven ground or near a high-traffic area, secure them. A simple method is to attach a couple of screws through a sturdy part of the gutter directly into the top rim of the barrel, or use straps to anchor them to a nearby wall.
Step-by-Step Guide: How to Build a Rainwater Catchment Off a Roof
Now, let's get down to the practical steps of constructing your very own rainwater collection system. The process is straightforward, perfect for a DIY enthusiast looking for a sustainable project. For a detailed look at setting up a similar system specifically for a garden shed, you might find our article DIY Rainwater Catchment: Easy Shed Gutter System for Your Garden particularly helpful.
1. Choose Your Structure and Location
While the focus of the reference was a shed, any roof can serve as your catchment surface. Consider a garage, workshop, or even a smaller outbuilding. The ideal structure will have:
- A suitable roof: Pitched roofs are best, allowing water to flow efficiently to the eaves.
- Accessibility: You'll need access for gutter installation and barrel placement.
- Stable ground: The area where your barrels will sit must be level and able to support the significant weight of full barrels.
- Proximity to use: If watering a garden, locate your barrels nearby to minimize hauling water.
2. Install Gutters
This is where you'll begin transforming your roof into a water collection powerhouse:
- Measure and Cut: Measure the length of the eave where you want to install your gutters. Cut your vinyl gutters to size using a hacksaw or tin snips.
- Attach Gutter Hangers: This was noted as the most challenging part in the reference, but proper technique makes it easier. Mark the placement of your gutter hangers along the eave, ensuring a slight slope (about 1/4 inch per 10 feet) towards where your downspout will be. This slope is crucial for water flow.
- Secure Hangers: Drill pilot holes through the shed wall where your marks are. Insert machine screws from the outside, then secure them on the inside with washers and nuts. This creates a much stronger attachment point for your gutters than simply screwing into the siding.
- Snap Gutters into Place: Once the hangers are secure, snap or slide your vinyl gutters into them. Attach end caps to the non-downspout end.
3. Set Up Downspout and Diversion
With your gutters in place, it's time to direct the flow:
- Install Gutter End with Drop: At the lowest point of your gutter run (where the slope leads), install a gutter end with a pre-cut hole for a downspout adapter.
- Connect Flex Spout: Attach a flexible downspout extension (flex spout) to this drop. Position the flex spout so it extends directly into the opening of your first rain barrel. This flexibility allows for easy adjustment and barrel cleaning.
4. Position and Connect Your Rain Barrels
Your storage units are now ready to be integrated:
- Place Barrels: Position your rain barrels on a stable, level surface beneath the flex spout. If you want to use gravity for watering, consider elevating them slightly on cinder blocks or a sturdy platform.
- Connect Multiple Barrels: If using more than one barrel, install bulkhead fittings near the bottom of each barrel and connect them with short sections of hose. Ensure these connections are watertight. This setup allows water to fill the first barrel, then overflow into the second, and so on, until all connected barrels are full.
- Secure Barrels: As mentioned, full barrels are heavy and prone to tipping. Drive two screws into the bottom edge of the gutter that extend into the top rim of the first rain barrel. This simple step helps hold the barrel securely in place, preventing accidental dislodging.
5. Maintenance and Overflow Management
A little attention ensures your system runs smoothly and safely:
- Regular Cleaning: Periodically clean your gutters to remove leaves, twigs, and other debris that can clog your system. Consider installing a gutter screen or leaf guard to minimize debris entering the gutters and barrels.
- First Flush Diverter (Optional but Recommended): For cleaner water, consider adding a first flush diverter. This simple device diverts the initial dirty runoff from the roof (which contains dust, bird droppings, etc.) before the cleaner rainwater enters your barrels.
- Overflow Plan: When your barrels are full, where will the excess water go? Ensure you have an overflow mechanism or direct the overflow away from your building's foundation to prevent water damage.
Maximizing Your Harvest and Usage
Once your rainwater collection system is operational, you'll be amazed at how quickly your barrels fill up. A 50-gallon barrel can fill in just a few days with moderate rainfall!
Practical Tips for Efficiency
- Elevate for Gravity: Placing your barrels on a sturdy, elevated platform (like cinder blocks or a wooden stand) allows gravity to do the work when you need to fill a watering can or attach a hose.
- Install Spigots: Add a spigot near the bottom of your barrels for easy access to the water.
- Consider a Screening Basket: Place a fine mesh screen or basket in the opening of your barrel where the flex spout enters. This acts as an additional filter to keep larger debris out.
Putting Your Collected Water to Work
The applications for your harvested rainwater are numerous:
- Garden Irrigation: This is the most common use. Fill watering cans directly from your spigot, or connect a hose for broader coverage. For larger gardens, you might consider a small, inexpensive pump (powered by solar or generator) to increase water pressure for sprinklers or drip irrigation.
- Outdoor Cleaning: Use it to wash your car, clean garden tools, rinse off patio furniture, or even wash windows.
- Livestock and Pets: Rainwater can be suitable for animals, though it’s always wise to consult with a vet regarding specific pet needs.
- Emergency Preparedness: Having a stored water supply is invaluable during power outages or water service interruptions.
Important Note: While rainwater is excellent for gardens and many outdoor tasks, it is generally not safe for drinking or indoor potable uses without proper filtration and treatment. Treat it as non-potable water unless you've invested in a sophisticated purification system.
Conclusion
Building a functional rainwater collection system for under a hundred dollars is a truly achievable and impactful DIY project. From extending your garden's reach with nutrient-rich water to taking significant strides toward water independence, the benefits are clear and immediate. By following these steps and leveraging affordable materials, you can easily set up a robust system that captures nature's bounty, reducing your environmental footprint and putting money back in your pocket. Don't let another rain shower go to waste – start planning your rainwater catchment system today and unlock the power of free, natural water.
